

Sanding Sheet Company: Your Guide to Long-Lasting Abrasive Sheets for Wood and Metal
2026-11-16
Ever wondered why some sanding sheets wear out after a few passes while others keep cutting smoothly through wood and metal? The difference often comes down to the abrasive quality and backing strength—and not all sheets are created equal. Whether you're refinishing hardwood or deburring steel, choosing the right sheet can save you time, money, and frustration. In this guide, we'll break down what makes sanding sheets last longer and how SHENZHEN SUN ABRASIVES has engineered their range to handle tough jobs without falling apart. Stick around to see which sheet will become your new go-to for every project.
What Actually Shortens the Life of a Sanding Sheet?
Most people assume sanding sheets wear out from simply rubbing against wood, but that's rarely the whole story. The real culprit is usually heat. When the abrasive grains get hot, the resin holding them to the backing softens and fails, so fresh grit falls away long before it's dull. Combine that with dust packing into the spaces between grains, and the sheet stops cutting almost immediately—it just slides around generating more friction and more heat.
Another overlooked factor is pressure. Pushing harder seems like it should speed things up, but it actually crushes the grit into the surface and tears the paper's backing. Once the backing wrinkles or develops a crease, the sheet becomes uneven and wears out in patches. Using too fine a grit for a heavy removal job has the same effect: instead of cutting, the fine abrasive burnishes the surface and gets smoothed over quickly.
It's also worth paying attention to how you handle the sheet between passes. Letting spent dust build up on the workpiece or folding the paper to fit into a corner creates permanent weak spots. And if you sand over paint, varnish, or filler that's still slightly soft, those materials melt into the abrasive and ruin it faster than any hardwood ever could.
Grit Numbers That Make Sense for Wood and Metal Projects
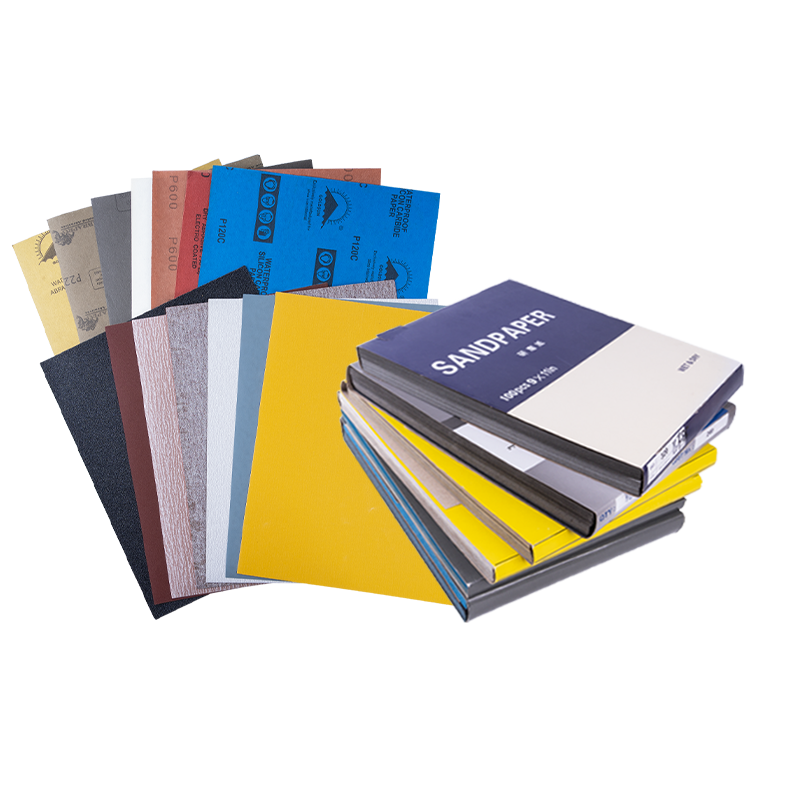
Most woodworkers reach for 80 grit to remove saw marks or tearout, but jumping straight to 220 leaves deep scratches that show up after staining. For raw lumber, start with 100 or 120 grit, then move to 150 and finish with 180 or 220. On softer woods like pine, stopping at 180 prevents the surface from becoming burnished and blotchy. Hardwoods such as oak or maple can handle a final pass at 220 without losing their ability to absorb finish.
Metal is a different animal. Aluminum oxide paper loads up fast, so switch to a ceramic or zirconia grit for aggressive stock removal. For removing mill scale or rust, 60 to 80 grit works well, but keep the pressure light and the speed low to avoid deep gouges. For a brushed finish on stainless steel, 120 grit followed by a non-woven abrasive pad gives a uniform linear grain. If you need a near-polish, work through 240, 320, and 400 grit, then move to a buffing compound.
One thing people overlook: grit numbers aren't universal across brands. A 220-grit silicon carbide paper cuts differently than a 220-grit aluminum oxide disc. For wood, stick with aluminum oxide or garnet. For metal, ceramic or silicon carbide holds up longer. Also, don't skip grits by more than 50% of the previous number—going from 80 to 150 leaves scratches that require twice the effort to remove later.
The Backing Material Most People Overlook (And Why It Matters)
When you're standing in a showroom running your fingers through the fibers, it's easy to ignore what's underneath. But that layer on the bottom of a rug or carpet does more than hold everything together. It controls whether the piece will buckle after six months, scratch your hardwood, or slide around like a bar of soap on tile. A flimsy backing can turn a decent rug into a hazard.
Natural backings like jute or cotton felt offer breathability and won't off-gas in a closed room, but they can shed and attract moisture. Synthetic options, especially action-bac or woven polypropylene, hold their shape well and resist mildew, yet they sometimes feel stiff underfoot and can scratch delicate floors unless you add a pad. The best choice depends on where the rug lives: a bathroom needs something that won't grow mold, while a bedroom might favor a softer, quieter backing.
Small Shop Habits That Keep Abrasive Sheets Sharp for Months
I used to burn through abrasive sheets like crazy, blaming the cheap brands. Turns out, a lot of it was my own storage habits. Leaving sandpaper loose on a dusty shelf or rolled up in a drawer is a sure way to dull it before you even start. Moisture is the enemy—it softens the backing and rusts the grit on some types. I now keep all my sheets flat inside an old file folder, separated by grit, and I toss in a couple of silica gel packs from shoe boxes. No more curled edges or damp spots, and the difference in cut is obvious the second you start sanding.
Another habit that pays off: stop pressing so hard. It feels natural to lean into the work, but all that does is generate heat and clog the abrasive. Let the grit do the cutting with light, even passes. When the surface gets gummy with wood resin or metal dust, I use a rubber cleaning stick—looks like a big eraser—and run it over the sheet a few times. That pulls out the packed debris and exposes fresh sharp edges. For really stubborn buildup, a quick blast of compressed air works wonders. I also keep separate sheets for wood and metal; cross-contaminating them just ruins both.
Finally, I mark the back of every sheet with its grit using a permanent marker and a color code—red for coarse, blue for medium, black for fine. That way I’m not squinting at faded numbers or mixing up similar grits. After each use, the sheet goes right back into its folder slot, not left on the bench to get stepped on. When a full sheet starts wearing unevenly, I cut it into smaller hand-sanding pads instead of tossing it. It’s surprising how many extra months you can squeeze out of what looks like a dead piece of sandpaper just by giving it a second life in tight corners.
Wet Sanding vs. Dry Sanding: A Quick Reality Check
There's a persistent myth that dry sanding is always faster and wet sanding is only for final polish. In practice, the choice usually comes down to what you're trying to protect. Dry sanding throws dust everywhere but gives you clear visibility of the scratch pattern, so it tends to work better for coarse shaping on wood or filler. The trade-off is paper clogging and heat buildup, especially on paints and clears.
Wet sanding adds water as a lubricant, which keeps the abrasive from loading up and carries away loose particles. That leads to a more consistent finish and much less airborne dust. The downside is you can't always see what the surface looks like until you squeegee it off, and the slurry can hide deeper scratches you'd otherwise catch early.
A quick reality check: if you're leveling primer or cutting through orange peel, wet sanding often saves time despite the extra cleanup because you change paper far less often. If you need to remove material fast on bare wood or rough filler, dry sanding still wins. Many pros combine both—dry to shape, wet to refine—and judge by the feel of the paper rather than any fixed rule.
When It's Time to Swap the Sheet—Not Push Through
There's a point where scrubbing harder stops being diligence and starts becoming denial. You know the moment: the fitted sheet has a thin spot that catches on your thumbnail, or the flat sheet's hem is fraying into threads that tangle in the wash. Pushing through means your morning routine now includes adjusting the same tear, smoothing the same pill, and pretending the fabric still feels crisp. Swapping the sheet isn't giving up—it's recognizing that a layer designed for rest has quietly turned into a small daily friction.
The real sign isn't always a visible hole. Sometimes it's the way the cotton no longer holds its shape after the third night, or how the color has faded into a gray that doesn't match any room you actually live in. You can feel it in the way your foot catches on a worn elastic corner at 2 a.m. When your mind starts cataloging the sheet's flaws while you're trying to fall asleep, the sheet has already stopped doing its job. Swapping it then isn't a luxury—it's a small act of clearing mental noise.
There's also the overlooked middle ground: the sheet that still functions but no longer fits the season or your body's needs. A flannel sheet in July, a percale that's too stiff for someone who sleeps hot, a deep-pocket sheet slipping off a thinner mattress. Pushing through the wrong sheet teaches you to tolerate discomfort you don't actually have to keep. The swap becomes less about replacement and more about realignment—choosing fabric that meets you where you are now, not where you were when you bought it.
FAQ
Metal generates more heat and tends to clog sheets with fine particles, so long life comes from a sharp ceramic or zirconia grain paired with a sturdy backing. For wood, clogging from resins is the bigger enemy, and an open-coat design lets dust escape instead of packing into the grit.
Start with 80 grit to remove old finish and shallow scratches, move to 120 for smoothing, and finish with 180 or 220 before staining. Skipping a step usually leaves deeper scratches that only show up after you apply the finish.
It is not ideal. Aluminum oxide works fine on wood but dulls quickly on steel, while zirconia or ceramic blends cut metal efficiently but can be too aggressive on soft wood. If you only want one all-rounder, choose a premium aluminum oxide with an anti-clog coating.
Check the grain type, backing weight, and bond. A heavier paper or cloth backing resists tearing, a closed or semi-open coat balances cut rate and loading, and a resin bond keeps grit in place under heat. Cheaper sheets often fail at the bond, not the grit.
Most likely you are using too fine a grit or pressing too hard. On metal, use a coarse grit to remove material and let the abrasive do the work. Excess pressure fractures the grain and glazes the surface, which only makes the sheet feel dull sooner.
Yes, water or a light oil carries away swarf and reduces heat, so the cutting edges stay sharp longer. Just make sure the sheet is rated for wet use and the backing does not soften.
Keep them flat in a dry place away from humidity and direct heat. Curled sheets can crack the bond, and moisture weakens the backing. If you have partial sheets, store them in a resealable bag with a small silica packet.
Moving too fast and pressing too hard. Slow, even passes let the grit cut cleanly and reduce heat. Also, clean or replace the sheet as soon as it clogs, because a loaded sheet just polishes the wood instead of sanding it.
Conclusion
Most sanding sheets die early not from abrasive wear but from clogging, heat, and tearing at the edges. If you're working resinous wood or soft metal, the grit loads up fast and then the sheet just slides instead of cutting. Picking the right grit matters more than buying expensive sheets: start coarse for shaping (around 60-80 for wood, 80-120 for metal), then move to 120-180 for smoothing, and finish above 220 only if you need a polish-ready surface. The backing is the part nobody checks until it rips—cloth and fiber backings flex better and outlast paper on contoured metal or rough timber, while stiff paper is fine for flat boards but gives out quickly on edges.
How you store and handle sheets changes their lifespan more than the brand. Keep them flat and dry; humidity softens the bond between grit and backing. In a small shop, simple habits—blowing out the dust with compressed air, using a rubber cleaning stick between passes, and not pressing harder than the tool's weight—can keep a sheet sharp for months. Wet sanding works for metal and automotive finishes because it washes away swarf and keeps the surface cool, but it will ruin most wood sanding sheets and cause rust on steel bodies. Know when to swap: if you're pushing harder to get the same result, seeing burn marks, or the sheet has bald spots at the edges, it's done. A fresh sheet costs less than the time you waste forcing a dead one.
Contact Us
Contact Person: Amanda Wang
Email: [email protected]
Tel/WhatsApp: +86-13602569854
Website: https://www.sunabrasives.com.cn